Saturday, June 4, 2011

Peanut Butter and Jelly Cookies

Want a favorite childhood sandwich in a bite-sized cookie?  Here ya go!

Ingredients

Originally published in Martha Stewart Magazine
1 1/4 cups all-purpose flour
1/2 teaspoon baking powder
1/2 teaspoon baking soda
1/2 teaspoon salt
3/4 cup smooth peanut butter
4 ounces (1 stick) unsalted butter, softened
1/3 cup packed light-brown sugar
1/3 cup granulated sugar, plus more for rolling
1 large egg
1 teaspoon pure vanilla extract
1/4 cup jam (your choice!)

Method

Preheat oven to 350 degrees. Whisk together flour, baking powder, baking soda, and salt. Beat peanut butter and butter with a mixer on medium speed until smooth.


Add sugars, and beat until pale and fluffy. Add egg and vanilla, and beat until incorporated. Reduce speed to low. Add dry ingredients, and mix until combined.


Scoop level tablespoons of dough, and form into balls.


Roll each ball in granulated sugar, and transfer to parchment-lined or spray the baking sheets, spacing about 2 inches apart.

Bake until cookies are puffy, about 10 minutes. Remove from oven, and make indentations in centers with your finger. Careful they're hot.


Return to oven, and bake until edges are golden, 6 to 7 minutes more. Transfer sheets to wire racks, and let cool completely.

Spoon about 1/2 teaspoon into each indentation.


 I decided to only make about 1/3 with the jam, the others I added some semi-sweet chocolate chips on top and also kept 1/3 plain old peanut butter cookies.

Enjoy!


Friday, June 3, 2011

Castle Hill Brunch

A beautiful brunch was what I enjoyed last Sunday morning at Castle Hill Inn in Newport, Rhode Island.  I wish I had some beautiful pictures to show you of the cliffs this Inn is on and the views of the ocean, but the fog took over and interrupted my plan. :(

The amazing food we had though, made up for the lack of view.

Here's the Inn.


A brunch cocktail. Perfectly spicy and sweet.


A brown sugar mini-muffin. Ryan's cutting his in the background, psh.


We ordered the "artisan cheese plate" to begin with. "Here are descriptions of the cheese you are about to enjoy," said the waiter as he gave us a folded paper. Thank you sir


My favorite was the Weybridge (a bleu cheese) spread on toast with a bit of the honey. Yum


Chowder.

 
Ryan's lobster hash with poached eggs and creme fraiche.


My omelet that had tons of fancy mushrooms, leeks, and local cheeses.


The home fries were perfect.

And so was this personal size ketchup bottle. Best part of the meal!


Tuesday, May 31, 2011

My First Wine Tasting

Ryan and I set off for Newport, Rhode Island to enjoy a weekend of good food, drinks, and mansions! If you haven't been there to see the cute town of Newport and explore the coastal views and the awesome nautical atmosphere, definitely take a ride there. Even if it's for the day.

We also found a great vineyard that wasn't too expensive for tastings, a guided tour, and had live JAZZ playing! It was quite beautiful.


The most known vineyard would be the Newport Vineyard, but right down the road from that was the Greenvale Vineyard in Portsmouth, which is smaller in their production, but less crowded and more personable.

Here's some photos of the tour.


A grape press...a smaller one representing the large ones they use


I will take you through the brief descriptions of the wine that we tried. Then I will tell you what I learned. I had trouble tasting the differences of the wines for my first time. I think that takes practice.

The nice lady poured our wine.


Yes, there's a thumbs up in #6...

  
1. Roscliff Pinot Gris - lovely aromas, delicate fruit flavors with a pleasant finish. Excellent with light meals, such as seafood or summer salads. I didn't care for this one, just because the taste of chardonnay isn't my favorite and that's what it reminded me of.  It was a bit watered down and just tasted like a headache.

2. 2007 Greenvale Chardonnay - well balanced. Dry and bright wine with delicious fruit character and subtle butter in the finish. Satisfying by itself or with a light meal. This one was a bit better. Ryan had fun slamming his glass down after drinking it in one sip while saying, "Psh. They all taste the same to me."

3. 2008 Chardonnay select - has a pleasant fruity aromas with a slightly oaky bouquet. Aged in French oak barrels. Pairs well with lobster or grilled chicken. Honestly, I think I could ALMOST taste the oak. It was a little "smokier" than the other two. Even though it was labeled as a chardonnay, I enjoyed this one the most so far.

4. 2008 Vidal Blanc - a French/American hybrid that produces an extremely aromatic. Pairs with ham, salads, cheese, and spicy foods. Medium dry. This one was just okay. Appreciated that it's a "hybrid", meaning the grape plant is a mix of two different kinds of plants creating a grape that has a different taste.

5. Skipping Stone White - a blend of Cayuga and Vidal Blanc (both two types of wines they produce). Very light in color, aromatic with a bright, floral nose, and very refreshing. It's great with cheese, a simple meal, or spicy foods. This was my favorite! The sweeter of them all. We bought a bottle of this to share.

6. 2006 Cabernet Franc - well balanced, medium bodied. Aromas of plum and spice. Pairs well with grilled or roasted meats. I am a red fan, so I enjoyed this one.

Along with the tasting was a bowl of crackers.


 We bought a bottle to split after the tasting. Ryan began missing his glass while he poured.


 So then he decided it'd be easier to just do this


Then this happened


We tried to hold it together and be classy for the afternoon.  Ryan just can only do that for so long.

Then Ryan found my camera while I went to the bathroom.  When I returned he told me that he took some nice photos. Here are Ryan's nice photos:


Beautiful. Thank you for those.

Cheers to never being too serious!

Tuesday, May 24, 2011

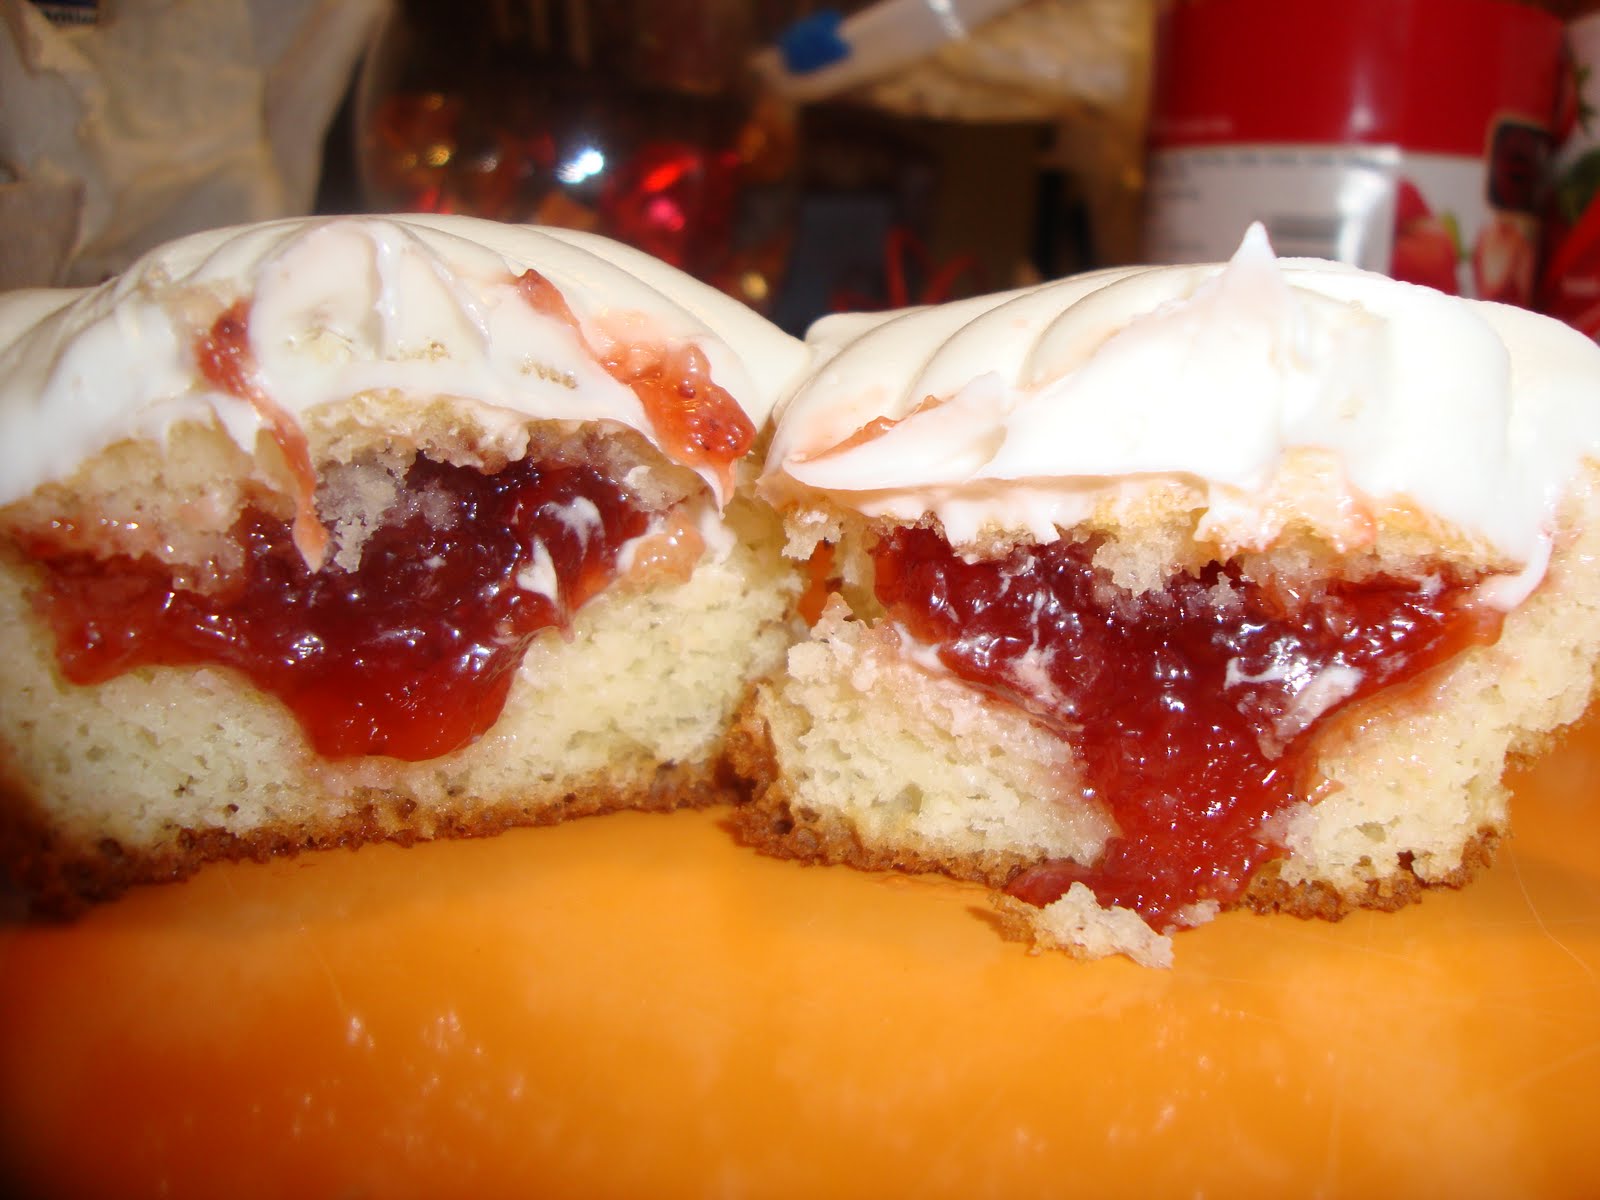
Strawberry filled Cupcakes


Once in a while at my school we have retired teachers sub in for teachers that are out.  The other day I got to spend my day with a teacher from last year who is so fabulously talented, sweet, and just an overall wonderful lady.  It was her birthday the following day so, obviously, I needed to  bake something special.  I wanted individual cupcakes for the children, but with something inside that would get them excited.

Jam!

Strawberry jam! You can get creative, but since I was working with picky little preschoolers here I decided to stick with the good stuff... Smuckers Seedless Strawberry Jam.

Here's an easy recipe for vanilla (versatile) cupcake that will never fail:

Ingredients

3 cups all-purpose flour
2 cups granulated sugar
3 teaspoons baking powder
1 teaspoon salt
2 sticks unsalted butter- room temperature
1 cup sour cream
2 large eggs,
4 large egg yolks
3 teaspoons vanilla extract

Method

1. Preheat oven to 350 degrees F. Line standard muffin/cupcake tins with paper or foil liners.
2. Whisk together flour, sugar, baking powder, and salt in bowl. Add butter, sour cream, egg and egg yolks, and vanilla.
3. Beat at medium speed until smooth (about 30 seconds).
4. Pour into cupcake tins. Bake until cupcake tops are pale gold and toothpick or skewer inserted into center comes out clean, 20 to 24 minutes. Remove the cupcakes from tin and transfer to wire rack; cool cupcakes to room temperature before cutting, adding jam, and frosting.


After they cool you're going to take a sharp knife and cut a hole in the top of the cupcake.  You're going to want to hold your knife at a 45 degree angle so that there is a hole in the center. Scoop out a little extra of the center so you can "jam the jam" down in there.


Take a tablespoon or so of your jam and place it in the hole. 


Put the tops back on!

 
Next, frosting!

Easy Buttercream Frosting

Ingredients

2½ sticks unsalted butter, softened
2½ cups confectioners’ sugar
A pinch salt- please don't skip this step, it really does make a difference
1 teaspoon vanilla extract
2 Tablespoons heavy cream

Method

1. Beat the softened butter at medium-high speed until smooth, about 20 seconds.
2. Add confectioners’ sugar and salt.  Beat at medium-low speed until the sugar has just become wet, about a minute.
3. Scrape down the sides and continue beating for another 30 seconds until mixture is fully incorporated, about 30 seconds.
4. Add the vanilla and heavy cream, and beat at medium speed until incorporated, about 20 seconds, then put the speed at medium-high and beat until light and fluffy.

Put into a zip-lock and cut a slant at the tip.

Frost away!


I like to start on the outside and swirl my way to the middle leaving the height in the middle of the cupcake.


I had to cut one in half to photograph it. Here's its insides.


Jesse (my roomate) enjoyed that I needed to do that. That's his hand, not mine.


Oh, and he also made himself a lamb burger and said, "Take a picture of this and put it on your blog." Here ya go Jesse..

Friday, May 20, 2011

Chocolate Truffles


Picture
SO delicious. These chocolate truffles are the easiest way to fake that you're a gourmet dessert chef. I've been reading some blogs that have the chocolate truffle recipes on them and have been wanting to create them myself for some time now.

So, today's the day.

They're the simplest candy to make for your sweetheart or for... yourself.  Dark chocolate, cream, vanilla. These balls of heaven only require three ingredients and some time.

Basic truffle ingredients
  • 8 ounces of semi-sweet or bittersweet chocolate (high quality, 62% cacao or higher), *well chopped into small pieces*
  • 1/2 cup of heavy whipping cream
  • 1 teaspoon of vanilla extract
Truffle coatings
  • Cocoa powder
  • Rainbow sprinkles
  • Finely chopped almonds

Method
 
1. In a small saucepan bring the heavy whipping cream to a simmer (this may take a while, be sure to stir and scrape down the sides with a rubber spatula every few minutes).

2. Place the chocolate in a separate bowl. Pour the cream over the chocolate, add the vanilla, and allow to stand for a few minutes then stir until smooth. (This chocolate base is called ganache.)

3. Allow to cool, then place in the refrigerator for two hours. Remove and with a teaspoon roll out balls of the ganache. Roll in your hands quickly.

4. Roll in cocoa powder or chopped nuts and serve, or place on wax paper and into the fridge.

Makes about 20 truffles.

Here's the only ingredients I used:
Picture
Chop that chocolate. Don't eat any!
Picture
1/2 cup heavy whipping cream.                                                                                                    Into a deep pot. Bring to a simmer.
Picture
Pour the simmering cream onto the chopped chocolate. Add the vanilla. Let this sit for a minute so the chocolate heats.
Picture
Stir it until it looks like this. Smooth and wonderful.
Picture
Place these in the refrigerator for about an hour. This will harden the chocolate just enough so when you scoop it out with a teaspoon it will form.

Once you scoop it out, roll it in your hands to form an even ball. The warmth of your hands will melt the chocolate just enough so you can put it into a topping of your choice where it will stick.  I used cocoa powder, chopped almonds, and little round sprinkles as my toppings.  Be creative! Some other toppings I just randomly thought of are:

  • Chopped pistachios, hazelnuts, or any nut of your choice
  • Coconut
  • Chopped peppermint candies (for Christmas time!)
  • Tasty children's cereal crushed up... like: Fruity pebbles, fruit loops, captain crunch, honey nut cheerios, etc.
  • Cinnamon sugar
Picture
Put them back in the fridge to save for guests or...... eat them right away.

Picture