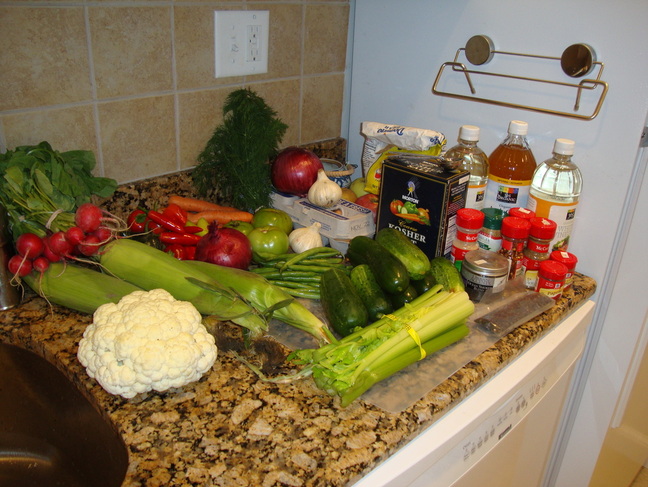
JARS! We needed lots of jars. More jars than we thought for the...oh how appropriate.....shall I say, "pickle party"? Mason jars worked just fine for Scott (who is an old college friend..pictures follow). I, on the other hand, used a beefy jar so I could stuff as many of those delicious vegetables into their vinegar bath.
The party started with the following ingredients:
A large amount of fresh vegetables:
-Cucumbers, obviously
-Carrots
-Beets
-Purple Onions
-Jalapenos
-Celery
-Green tomatoes
-Cauliflower
-Green Beans
-Radishes
Salt (Kosher
and smoked)
White Vinegar
Apple Cider Vinegar
Sugar
Fresh Garlic
Fresh Dill
Black Peppercorns
Celery Salt
I probably missed listing a few ingredients here, but you get the picture (no pun intended).
Oh, and the eggs you see there.. Scott just forgot to put them in the fridge.
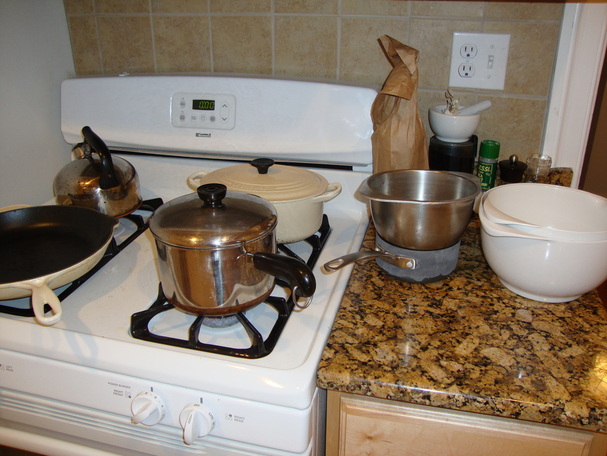
Anyways, we got to sanitizing each and every jar and lid with a huge lobster pot of boiling water. Sort of a tedious task, but necessary. We also then got to the peeling and chopping of the vegetables.
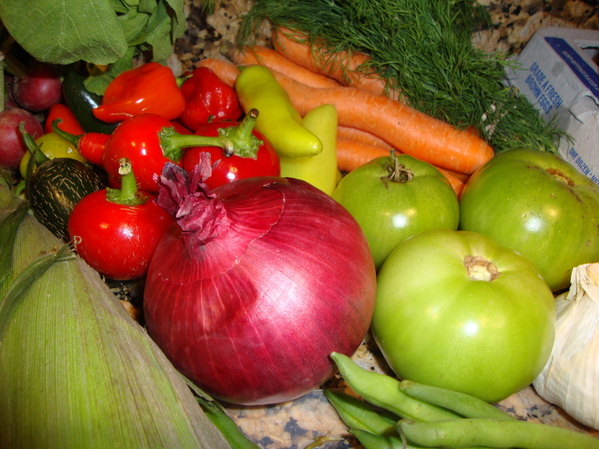
The sitting vegetables were just so pretty! I honestly had trouble capturing a picture that showed their colorful beauty. Corny. Sorry.
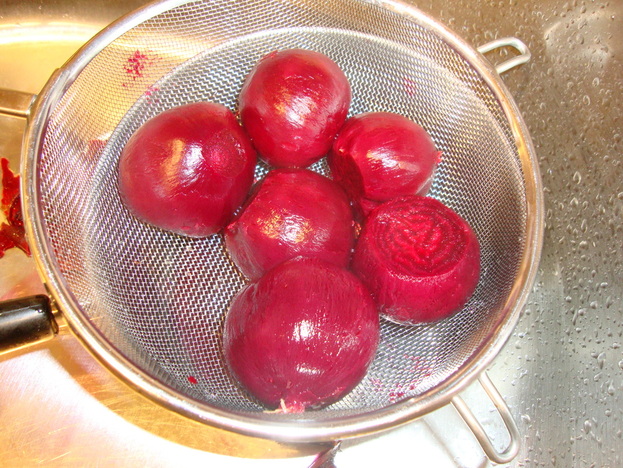
We boiled some beets. Skinned em. They smelled up the kitchen with that soil smell and turned the sink a bloody red. What a great vegetable, huh?
Next, was the special pickling potion that we had to create! We had so many ingredients to throw in that I think we all forgot to follow any sort of recipe and just mixed our own vinegar-based concoction.
My potion included:
White Vinegar
Apple Cider Vinegar (equal parts)
More Salt
Less Sugar
Peppercorns
Raw Garlic
Dill
We put it all into a covered pot, turned the heat on high, and waited for a nice boil.
Here's my stuffed jar.
The brine boiled for about 5 minutes. We took it off the stove and used a funnel to pour it through to be extra careful. As my pickled vegetables sat in the fridge for 2 weeks, they became a deep
dark purple because of the beets. I wish I took a picture before I ate them all! Oops.
Here's the pouring. It was a great sinus cleanser all right. Boiling vinegar evaporating up into your face!

JARS! We needed lots of jars. More jars than we thought for the...oh how appropriate.....shall I say, "pickle party"? Mason jars worked just fine for Scott (who is an old college friend..pictures follow). I, on the other hand, used a beefy jar so I could stuff as many of those delicious vegetables into their vinegar bath.
The party started with the following ingredients:
A large amount of fresh vegetables:
-Cucumbers, obviously
-Carrots
-Beets
-Purple Onions
-Jalapenos
-Celery
-Green tomatoes
-Cauliflower
-Green Beans
-Radishes
Salt (Kosher and smoked)
White Vinegar
Apple Cider Vinegar
Sugar
Fresh Garlic
Fresh Dill
Black Peppercorns
Celery Salt I probably missed listing a few ingredients here, but you get the picture (no pun intended).
Oh, and the eggs you see there.. Scott just forgot to put them in the fridge.
Anyways, we got to sanitizing each and every jar and lid with a huge lobster pot of boiling water. Sort of a tedious task, but necessary. We also then got to the peeling and chopping of the vegetables. The sitting vegetables were just so pretty! I honestly had trouble capturing a picture that showed their colorful beauty. Corny. Sorry.
We boiled some beets. Skinned em. They smelled up the kitchen with that soil smell and turned the sink a bloody red. What a great vegetable, huh? Next, was the special pickling potion that we had to create! We had so many ingredients to throw in that I think we all forgot to follow any sort of recipe and just mixed our own vinegar-based concoction.
My potion included:
White Vinegar
Apple Cider Vinegar (equal parts)
More Salt
Less Sugar
Peppercorns
Raw Garlic
Dill
We put it all into a covered pot, turned the heat on high, and waited for a nice boil. And here is a picture of my patient jar. And my stuffed jar. The brine boiled for about 5 minutes. We took it off the stove and used a funnel to pour it through to be extra careful. As my pickled vegetables sat in the fridge for 2 weeks, they became a deep dark purple because of the beets. I wish I took a picture before I ate them all! Oops.
Here's the pouring. It was a great sinus cleanser all right. Boiling vinegar evaporating up into your face! Here's a shot right after we put the lid on. A 2 week wait and a delicious snack awaited me! Scott used a bunch of other vegetables that he bought at the Copley Square Farmers Market. He also added a lot of jalapenos too. I just wanted the traditional...salty, tangy, sour pickles. Next time, I will venture out a bit more. Here are pictures of his jars. And the finale. The jar all the way to the left is filled with eggs. Looks like something you'd see in Harvard's Natural History Museum. Floating, white, and slimy figures in a cloudy liquid. It's turning more purple as it sits. It's sort of mothering the other little jars. How cute
Closer Lastly, here's Seth with his more expensive camera than mine taking more pictures of our creations. Don't be shy with your pickles. Plan a "pickle party" and throw in whatever vegetables and spices that suit you. :o) Oh, and take pictures. |